Computer aided design
On this page, I will be showing on how I used Gimp to resize my picture and how to remove background and add another layer, as well as the usage of fusion 360.
Resize photo to height of 500 pixels
Step 1
My first step is to load the image into gimp
- Go file, open and then select the image you want to resize
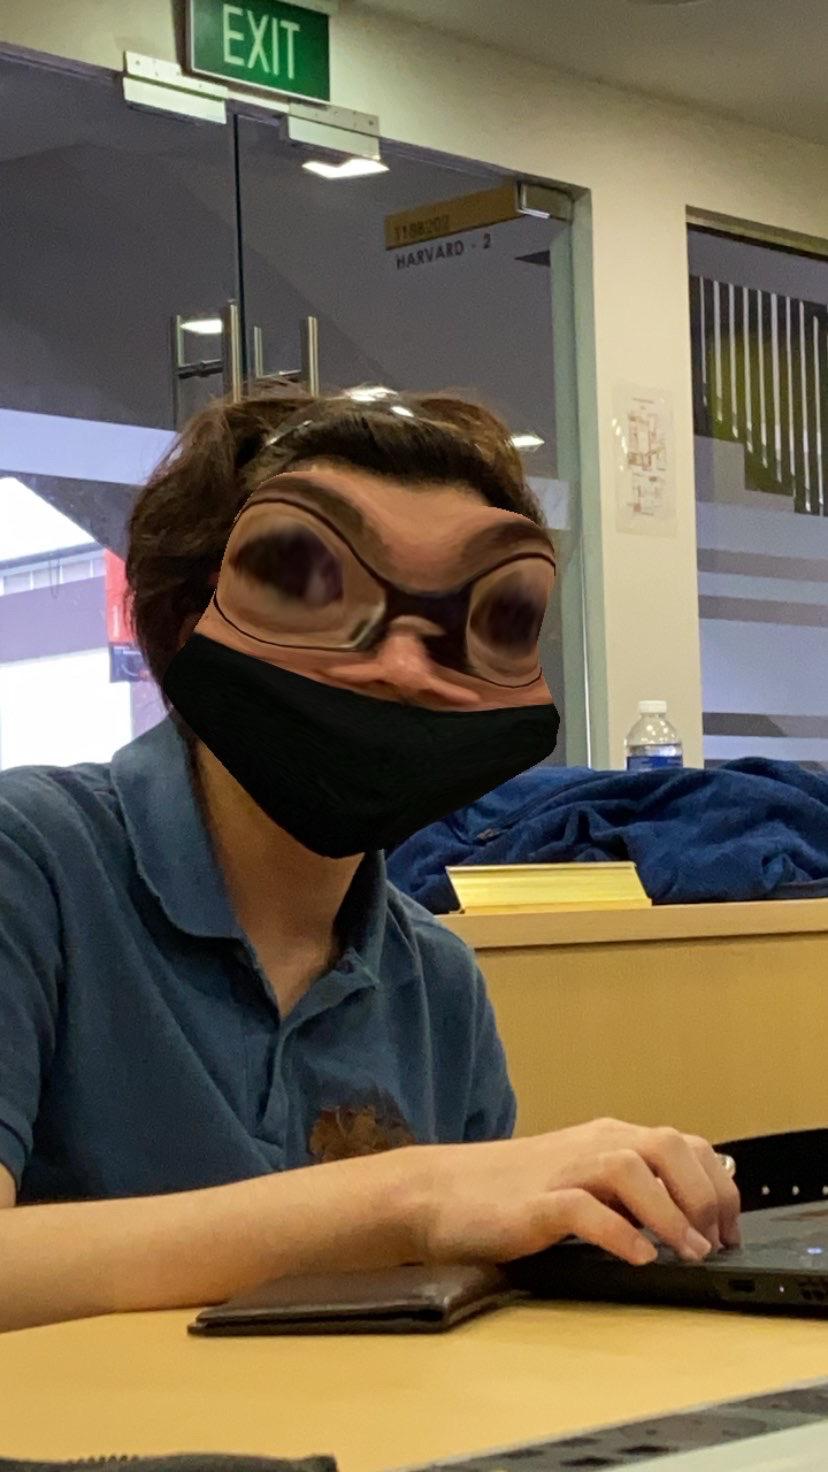
- the image I want to resize is below
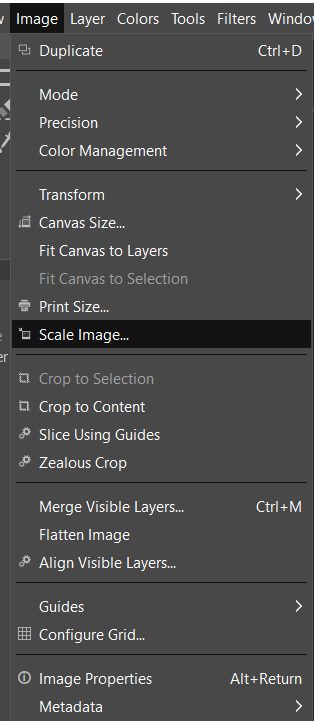
Step 2
Next, go to image tab under scale image, then change height of picture to 500 pixels.
- the width of the picture will automatically be changed by the system
Done
This is it for the resizing of the picture, scroll down to see the image I resized and the next guide is also below.
Removing background and adding seaside view
Step 1
The first step is loading the image into Gimp.
- Go file, open and then select the image you want to remove the background
- the image I want to have the background removed is below
Step 2
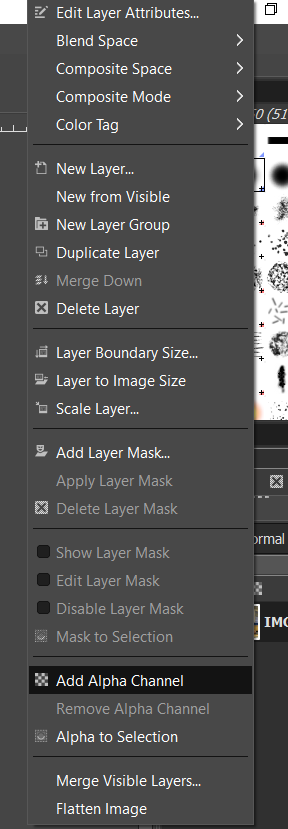
Next is to add a alpha channel so that the background is blank and able to edit and remove background
- Right click on the image loaded on the bottom right hand corner
- Next is to click on "add alpha channel" to have a transparent background behind the image
Step 3
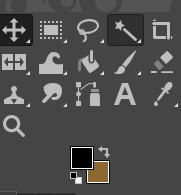
Next step is remove the background by clicking on the fuzzy selection tool on the toolbar.
- click on the background and press the delete key to delete
- Use the eraser tool for smaller portions that will take a long time using fuzzy tool
Step 4
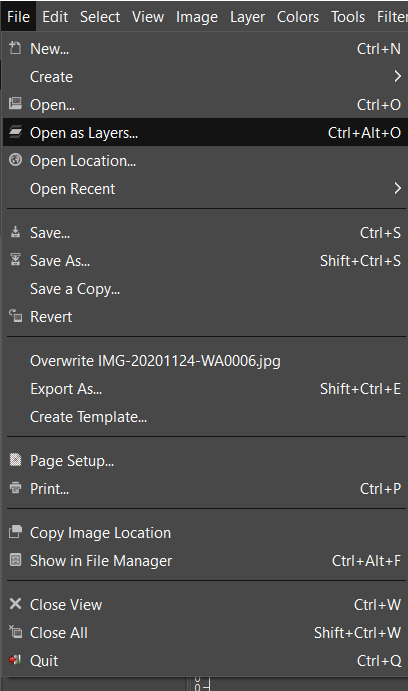
Next step is to add the seaside view you want to have. This can be done by clicking on files, open as layers, then choosing the seaside picture.
- make sure the first transparent picture is in front of the added picture
- this can be done by dragging the picture up
Step 5
This step is to make adjustments to your picture and make sure it is scaled properly before exporting it out.
- look out for the image scaling
- make sure it is the design you want before saving.
Done
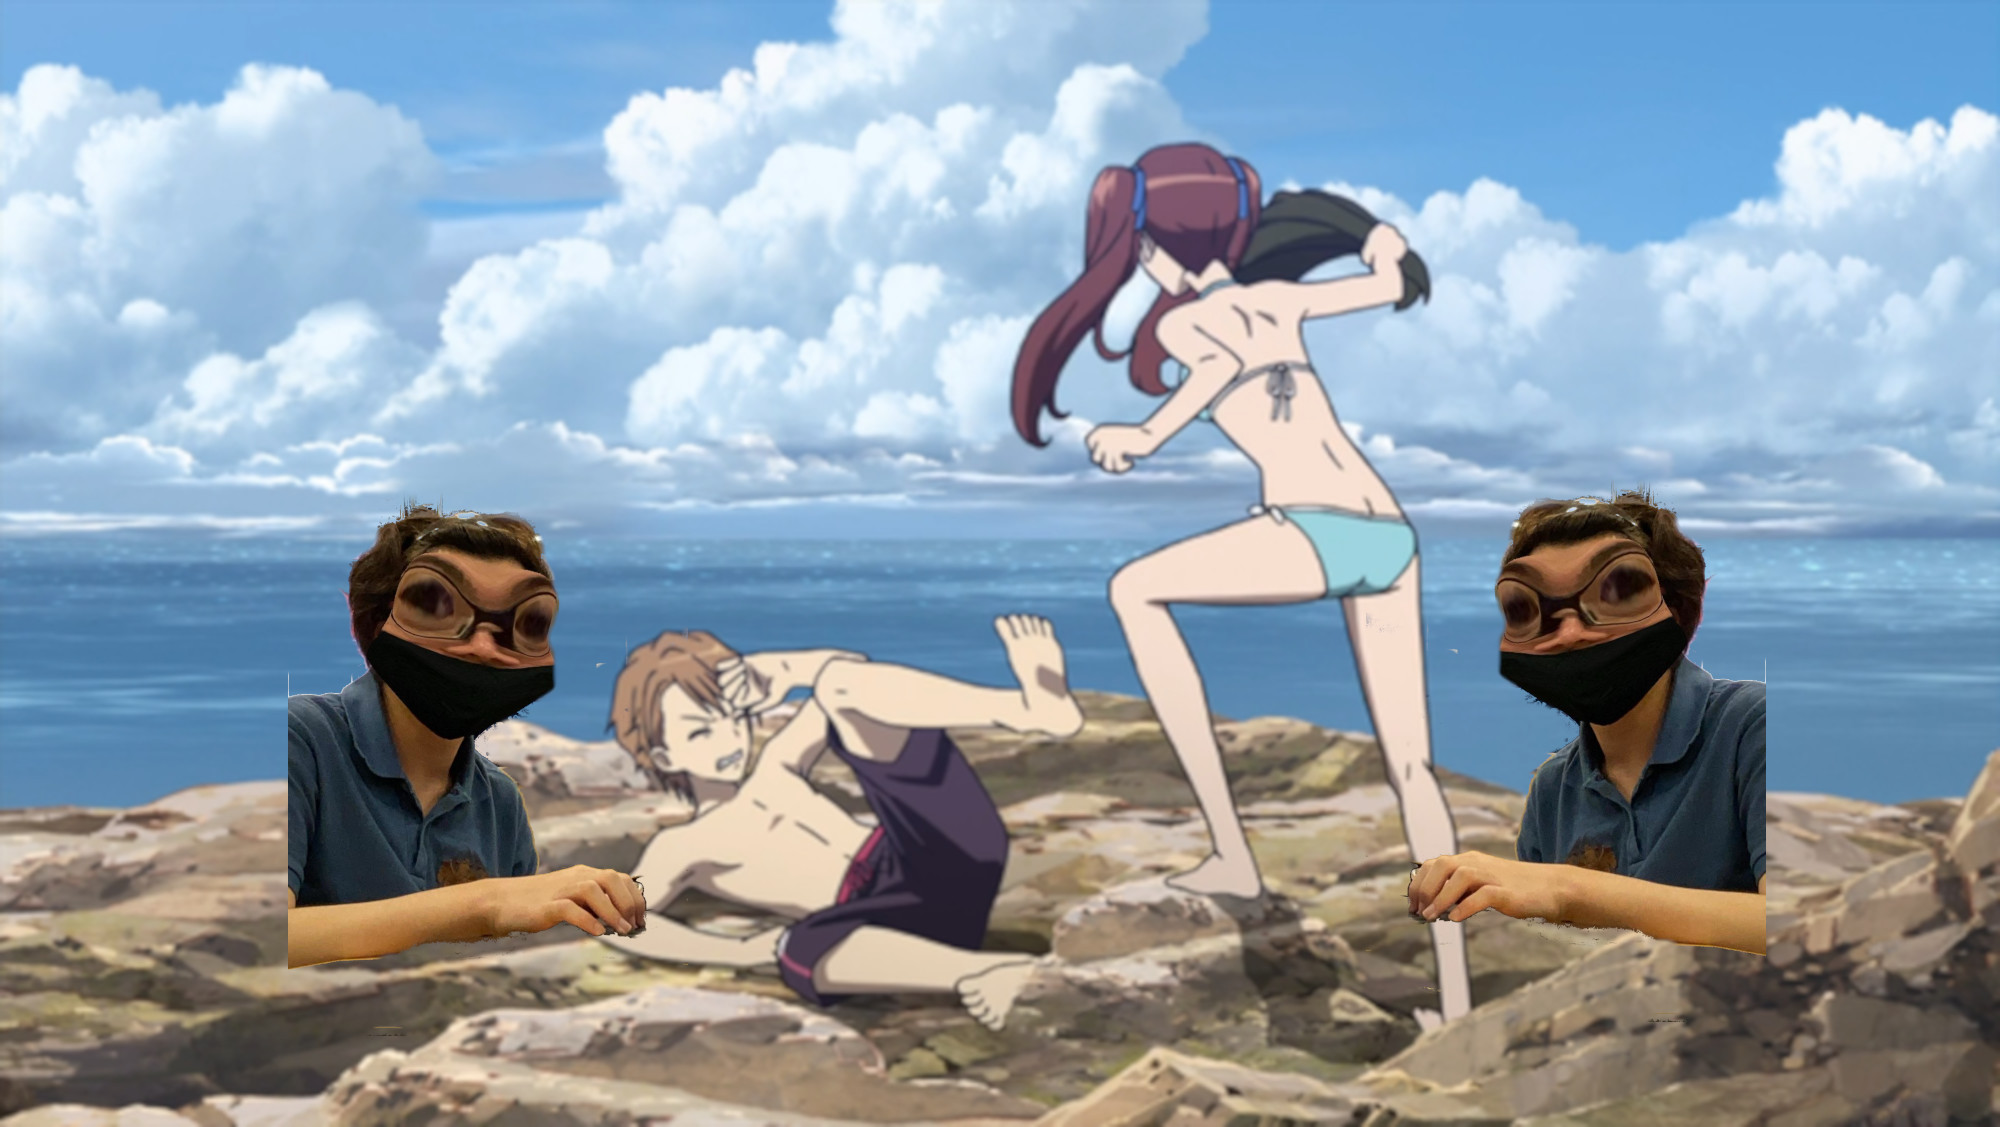
And done! That is it for the removing background from image and adding a seaside view. Below are my picture on the seaside view:
Exercise 1 on fusion 360
Step 1
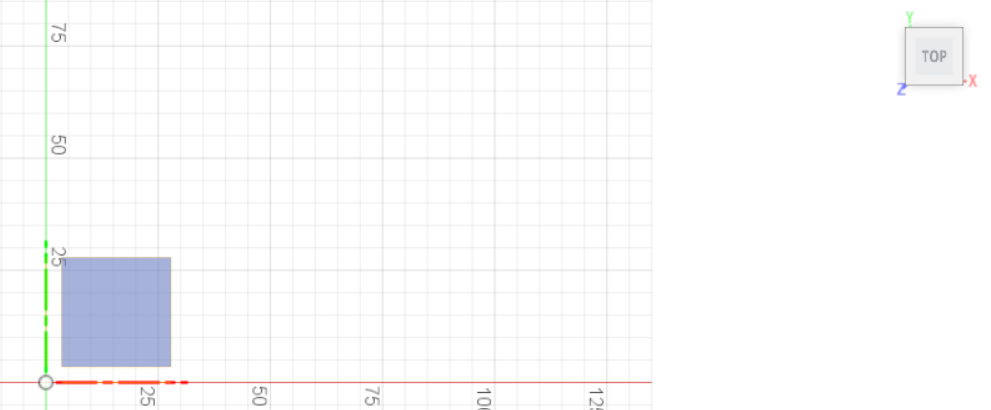
The first step is to create a new sketch under a new file for fusion 360
- once you go into fusion 360, click on new sketch would do
- the sketch would be viewed from the top, x and y axis

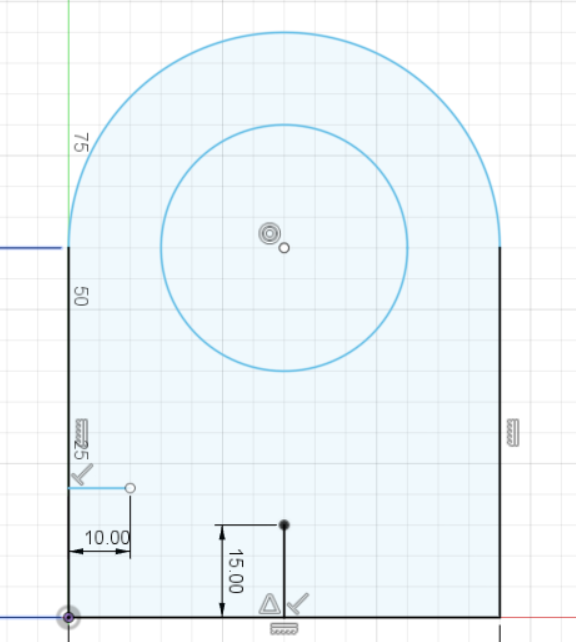
Step 2
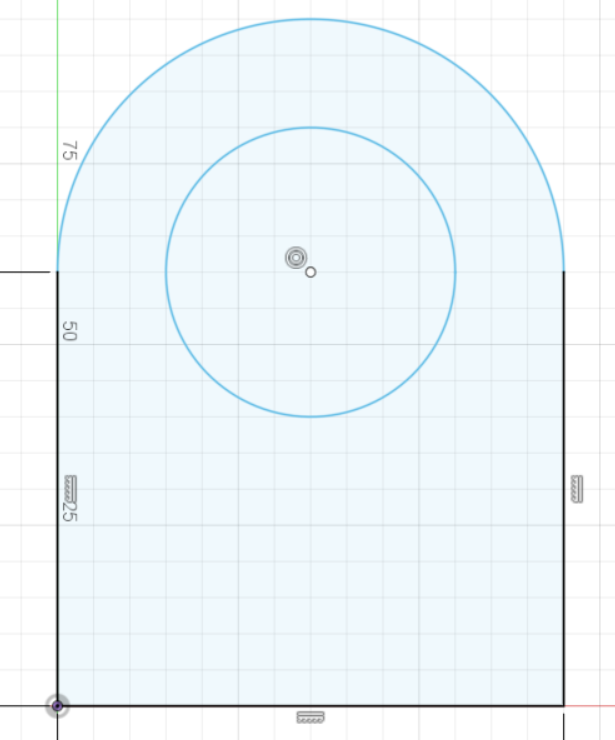
Next step is sketch the rectangle from the base and set the length and width to 60 and 70. Then sketch the circles of diameter of 40 and diameter of 70
- all lengths and measurements here are in mm and not cm
- sketching can be done by clicking the rectangle icon and circle icon under sketch
- use the trim tool under modify to remove the excess part of the bigger circle
Step 3
The next step is to measure the distance for the sketch. You can use the line tool under sketch to measure the distance
- all lengths and measurements here are in mm and not cm
- sketching can be done by clicking the rectangle icon and circle icon under sketch
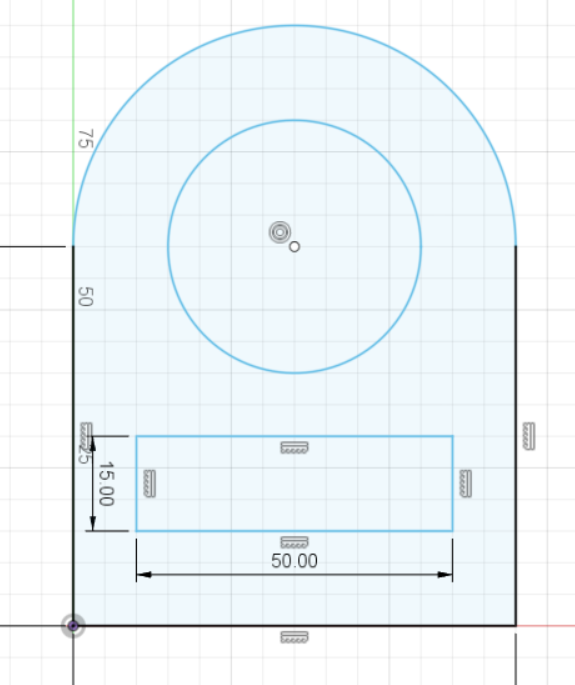
Step 4
The forth step is to sketch the middle rectangle part, then remove the unnessessary parts to beautify the product.
- Click on the rectangle icon under create then start from the lower left corner
- then type the dimensions out and beautify the product by trimming out not needed parts
Done
This is it for the first exercise for the fusion 360. Below is my sketch on fusion 360 and other exercises are below.
download link is here: here
Exercise 2 of fusion 360
Step 1
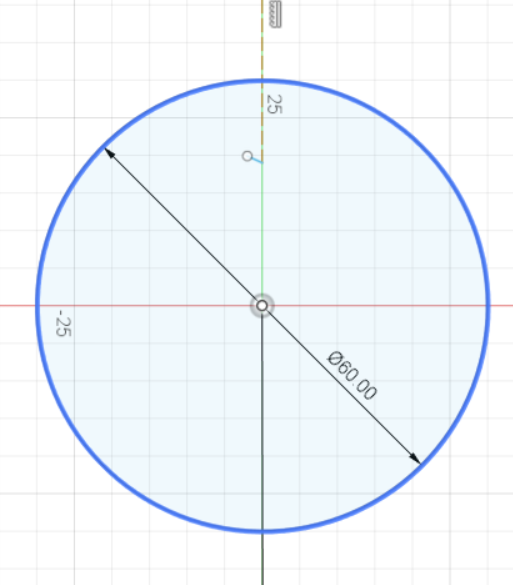
The first step is to start as a new project and a new sketch at the x-y plane, then start by drawing the larger circle
- all lengths and measurements here are in mm and not cm
- sketching can be done by clicking the circle icon under create
- the diameter of the circle is 60mm
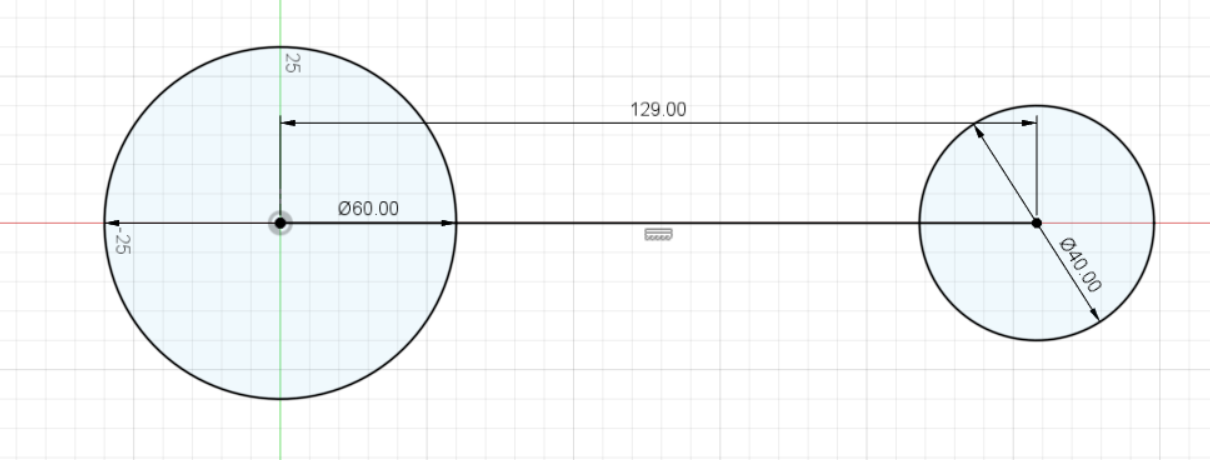
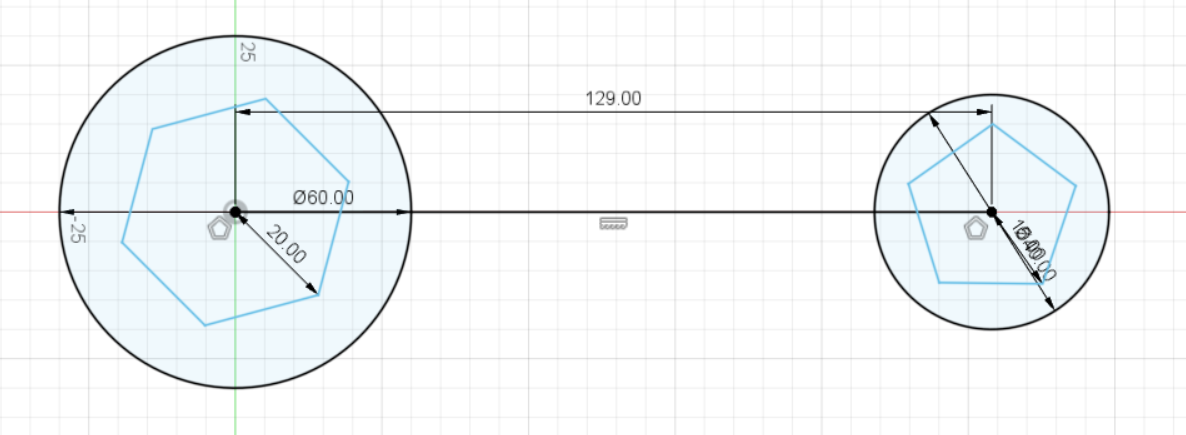
Step 2
The second step is to draw a line from the centre of the circle to the right with a length of 129mm and keep to the axis. Then create another circle at the end of the line, with a diameter of 40mm.
Step 3
Create an inscribed polygon with mid length 0f 20mm and 6 sides for the bigger circle and inscribed polygon with mid length of 15mm and 5 sides for the smaller circle.
Step 4
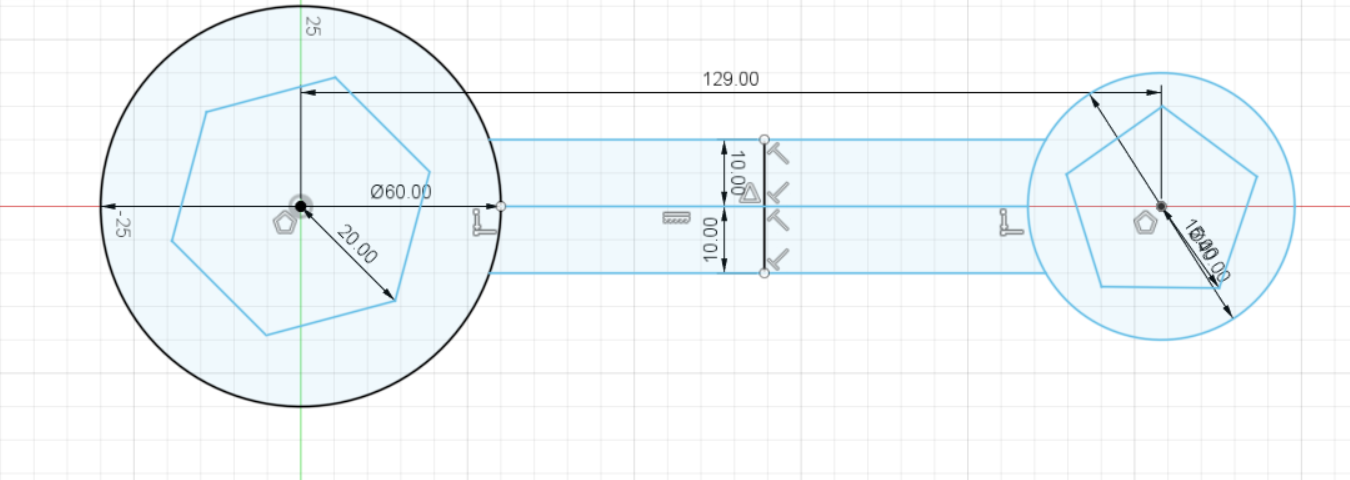
Next is to draw a line 10mm from the centre line for both above the line and below the line. Then, draw 2 straight lines connecting the 2 circles and passing the 10mm lines.
- In this step, you can cut away the not needed lines
Step 5
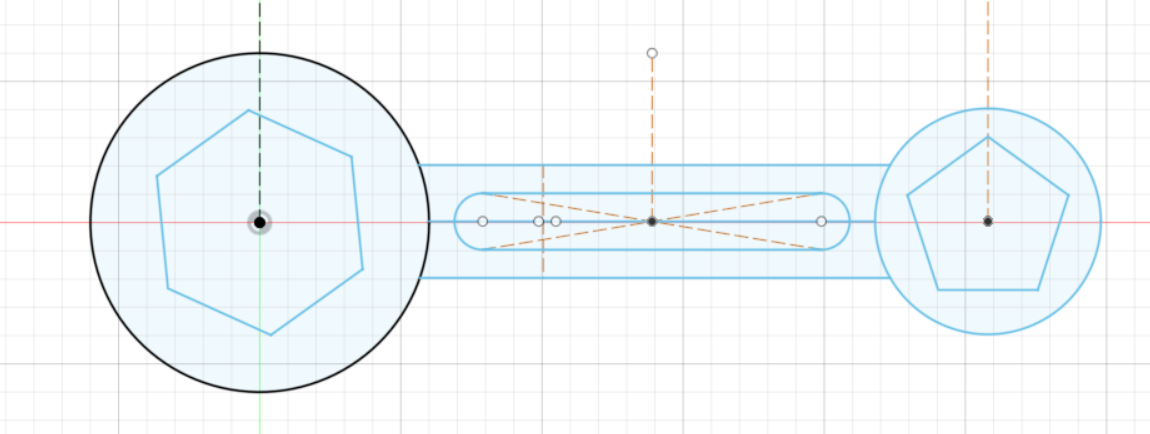
Next is to find the centre point of the middle line and then use "Draw rectangle using centre point" with a height of 10mm and length of 60mm. Then use "edge to edge circle" to draw at the sides of the rectangle.
- when you are at the centre point of the middle line, a triangle will be shown
- trim away the parts you do not need
- after doing all the steps above, click on finish sketch
Step 6
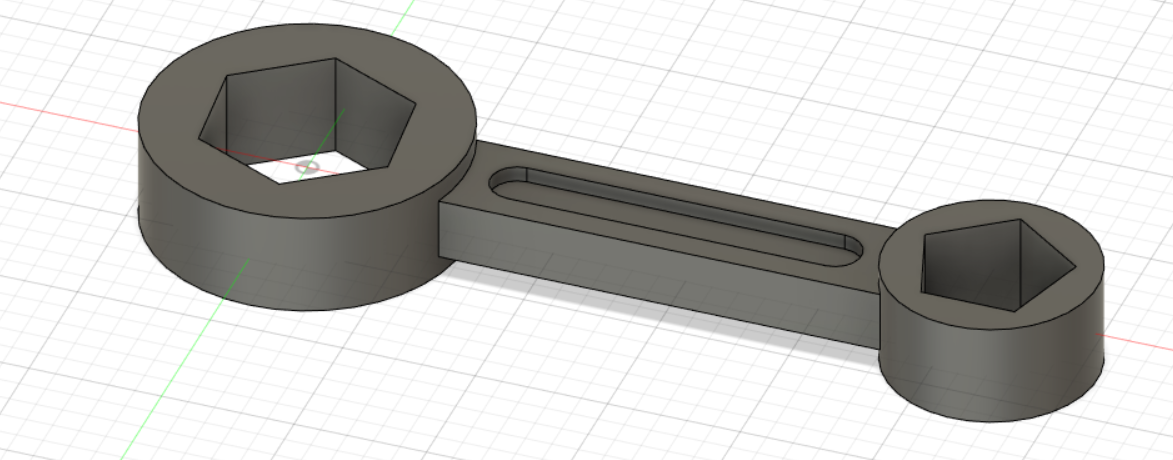
Next, click on the 2 circles and extrude them, set to symmetrical with distance of 10mm. It will be the same for the middle connecting portion except the distance is 6mm.
- use shift+click when clicking on the second circle
- after extruding once, the sketch will be hidden
- click on the eye icon next to your sketch to have it to appear again
Done
This is it for exercise 2 of fusion 360. Below are some pictures of my finished product of exercise 2. Next will be exercise 3.
Exercise 3 of fusion 360
Step 1
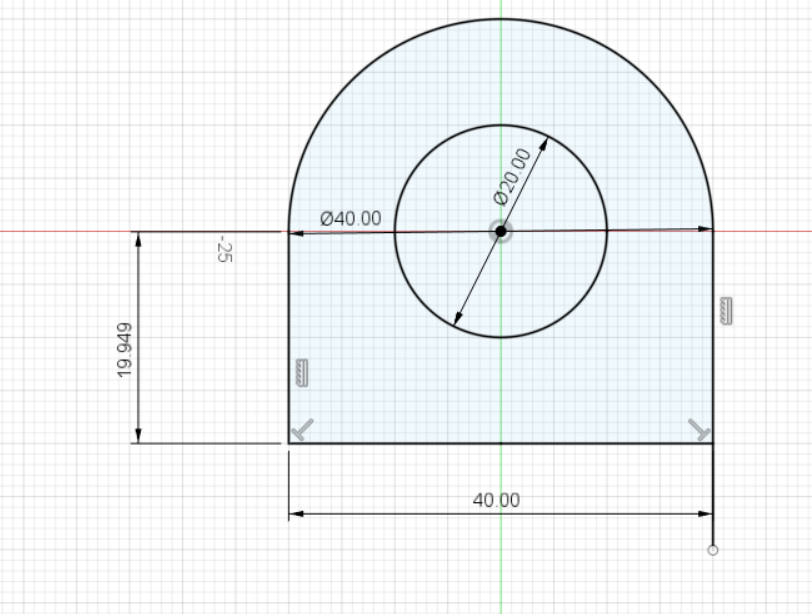
The first step is to start as a new project and a new sketch at the x-y plane, then start by drawing the larger circle with a diameter of 40mm, a smaller circle with a diameter of 20mm and a rectangle from the radius of larger circle with 20mm width and 40mm length. Below is an illustration of the instructions above:
Step 2
The second step is to extrude it out by 5mm. The picture below is the end product of step 2:

Step 3
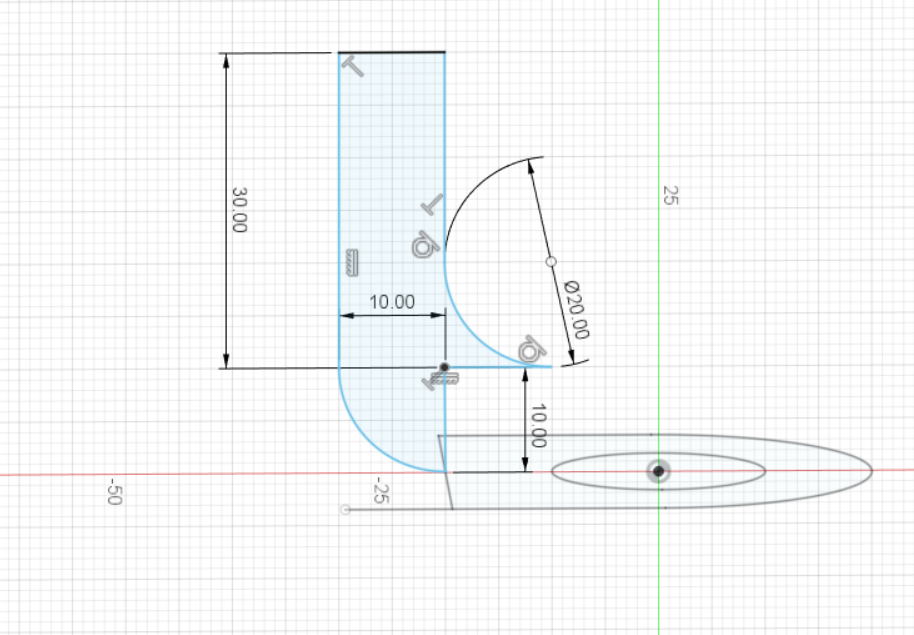
The third step is to create a new sketch from x to z axis. Referring to the previous sketch, sketch out a circle of a diameter of 20mm at the flat base of the first sketch. Then create a rectangle above the quarter of the circle closest to the first sketch, with a length of 30mm and width of 10mm. Create a circle of 20mm diameter 10mm away from the rectangle and 20 mm away from the first sketch, then cut away the not needed parts. Below is a picture showing the end product of step 3:
Step 4
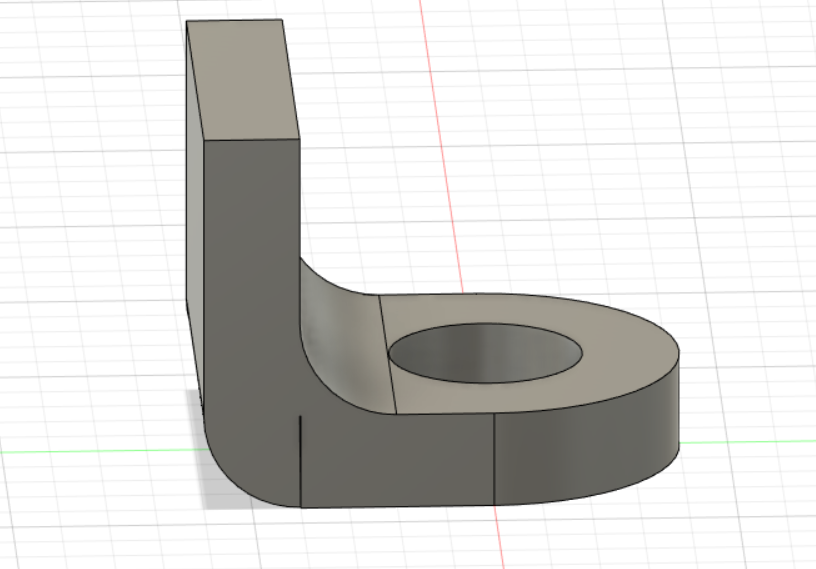
The forth step is to extrude it out with symmetrical mode at 20mm, then use the combine tool to combine them together. The picture below is the end product of step 4:
Step 5
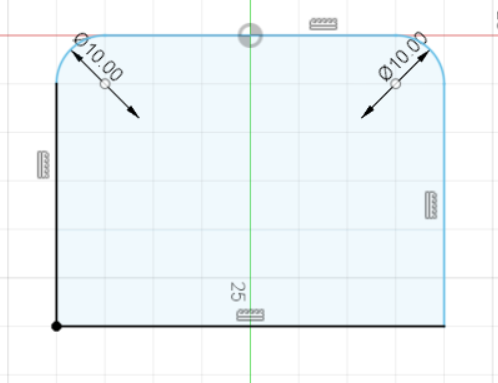
The next step is to create a sketch directly on the second body with a view from the top. Then create a rectangle with width of 40mm and length of 30mm and round the sides by using 10mm diameter circles. Do remember to cut out the not needed lines. The picture below is the end product of step 5:
Step 6
The last step is to extrude it out by 10mm, then use the combine tool to combine them together. The picture below is the end product of step 6:
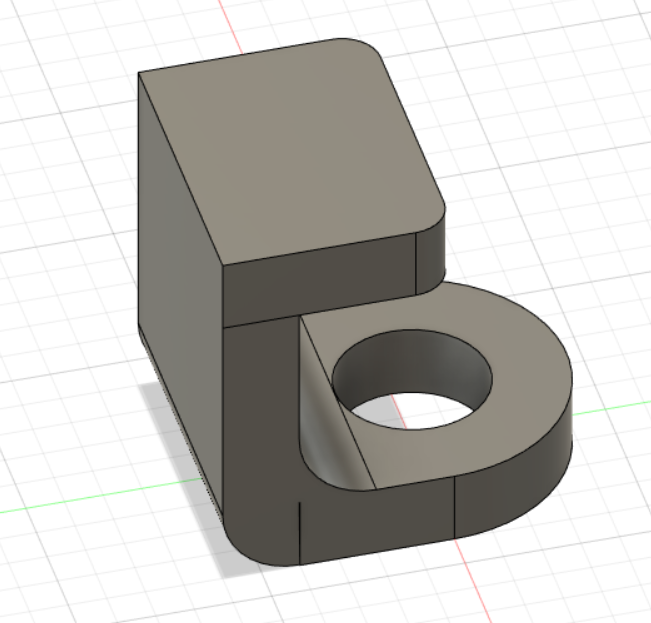
Done
With this, we are done with the third exercise of fusion 360. I have attached my file for the third exercise below